Showing posts with label spoonflower. Show all posts

Wednesday, October 2, 2013

Monster pencil case tutorial

Kids are back in school, Halloween is coming up, so I figured it was about time to post up some instructions to the Monster Pencil Case fabric I recently added to my spoonflower shop. One fat quarter gives you supplies to make three different designs, all you need is a zipper and some simple lining fabric!

This is a simple easy project that takes almost no time, I love making zipper pouches. Here's what the fabric looks like:


First cut out all the pieces. Cut a matching piece of lining fabric for each part. Cut the face straight across where the mouth will be.

I used a 7" zipper for this that needed a bit of extension, luckily there's extra fabric for that. Layer the fabric, right sides together, with the zipper in between like a sandwich, and sew across where the zipper teeth end.


Lay the head, zipper and lining together. Make sure the zipper teeth are against your cool outside fabric, not the lining.

Sew across the head.

Open the head up and iron flat.

Do the same for the mouth layers.

Open the mouth layers and now you've got a whole face that unzips!

Now lay the backing down, set the face on top of it, and set the back of the head right-side down on the face.

Pin together.

Sew around, but leave 3-4" open at the bottom to turn inside-out.

Turn, and topstitch or hand stitch the opening. Ta-da! Scary! Yet functional, don't you love it!

Tuesday, September 24, 2013

Survey of spoonflower colors - full saturation to black gradient

Spoonflower requires that designers order swatches of their designs before publishing. It's a good policy, because print often looks different than screen, especially with darker colors. Dark blue can easily wind up just being black. Subtle variations are often totally lost.

To help me out recently, I printed a swatch that crosses all hues, fading into black. Here was the original graphic I uploaded:


And here was the printed fabric on kona cotton:


I then made a "color averaged" version.


Now when I design my fabrics in GIMP, I have a two-layer file with my color averaged file on the top layer, "graphic" one underneath. I pick out what I want a color to look like using the color-averaged version, but "grab" the original version of it.

I plan to do some other gradients with this method... for example, I'm still trying to figure out how to get brown. Pastels are a lot easier on spoonflower, much more likely to come out looking like they do on the screen.

Thursday, September 19, 2013

My geeky baby onesie designs finished up by clichemom - yay!

A while back I introduced a collection on spoonflower of geeky baby onesie kits - cut and sew designs so you could sew up a onesie inspired by your favorite sci-fi show. Of course then what happened? I got Etsy convos from people wanting me to sew them up and sell them. Great, except I've got a full time job and just had another baby... no time!

Then I remembered heck, I'm on etsy! There are shops all over the place run by people looking for more sales, talented artists who can totally sew. I searched around and found someone who was already making geeky baby items, with snaps even... for me that was the most pain-in-the-rear part of the baby onesies, I hate closures. But my new friend Katie at clichemom has no problem with them.

So I convo'ed her to ask if I could send inquiries her way, she said sure, and we're off... she's fulfilling orders and giving me design feedback, I'm back to being just a fabric designer. Collaboration is awesome!

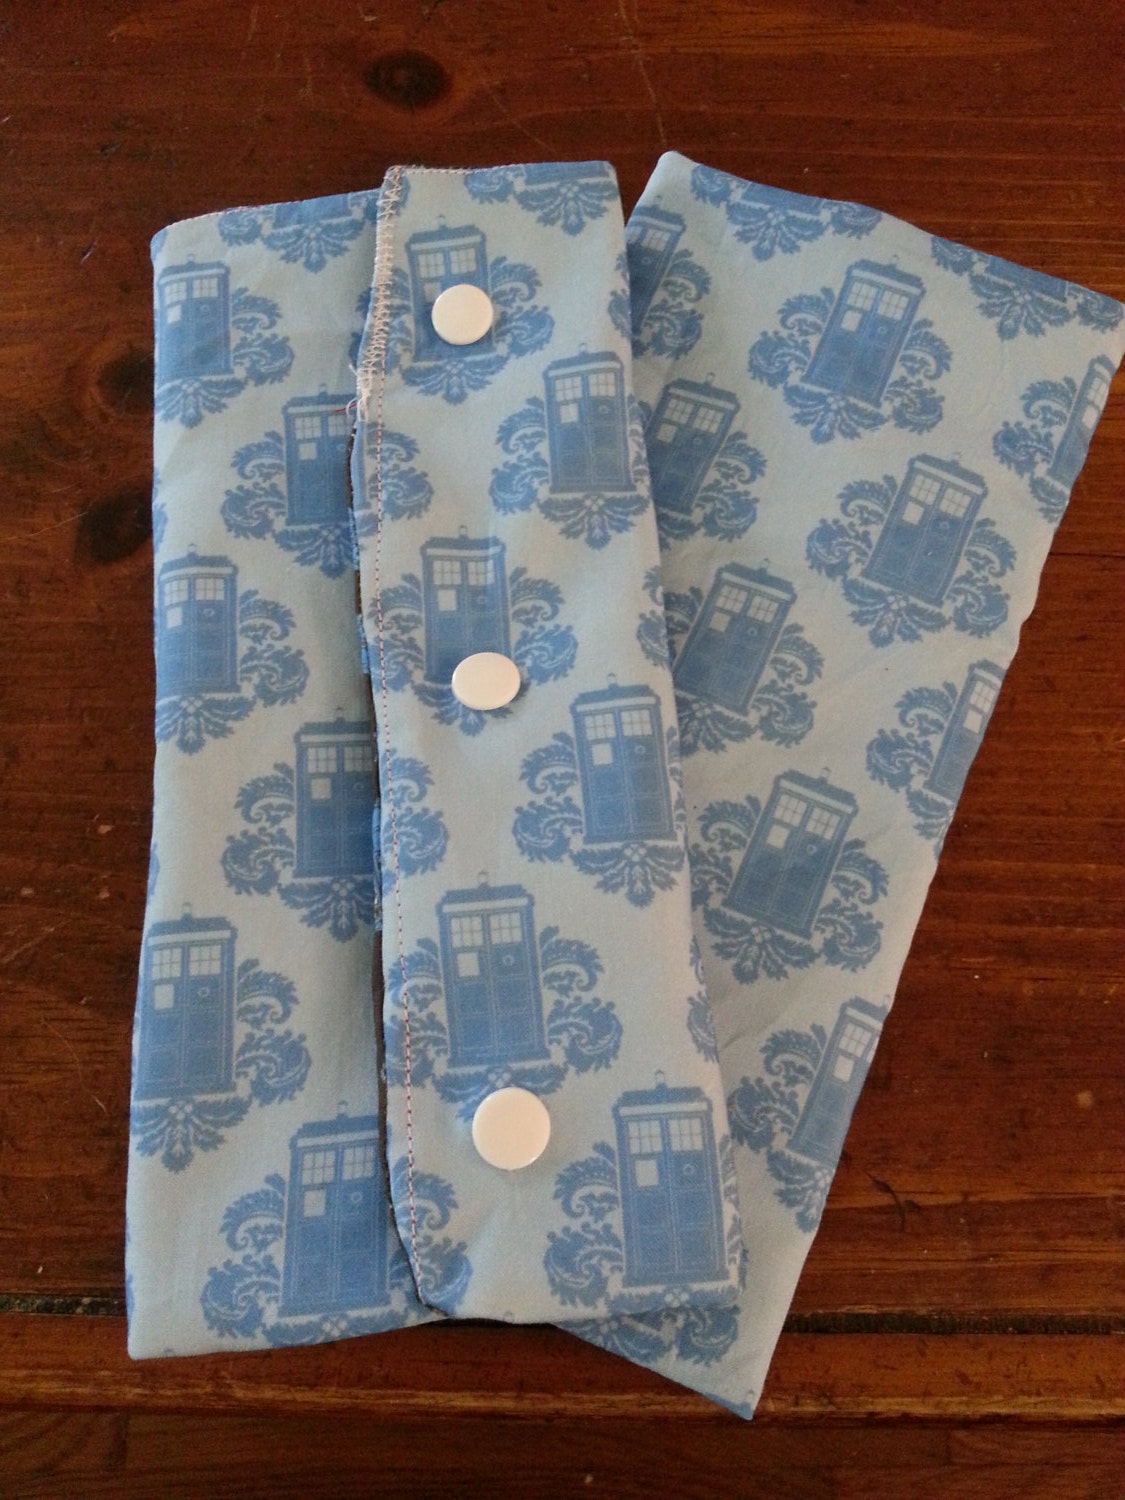
Here's what originally drew me to approach her, these adorable suck pads... basically little pads that snap around your baby carrier (bjorn, ergo, whatever pricy thing you've invested in) so your kid can drool all over the straps and you've got an easy removable bit to throw in the washer:

Blue fancy tardis suck padsBlue fancy tardis suck pads
by cichemom


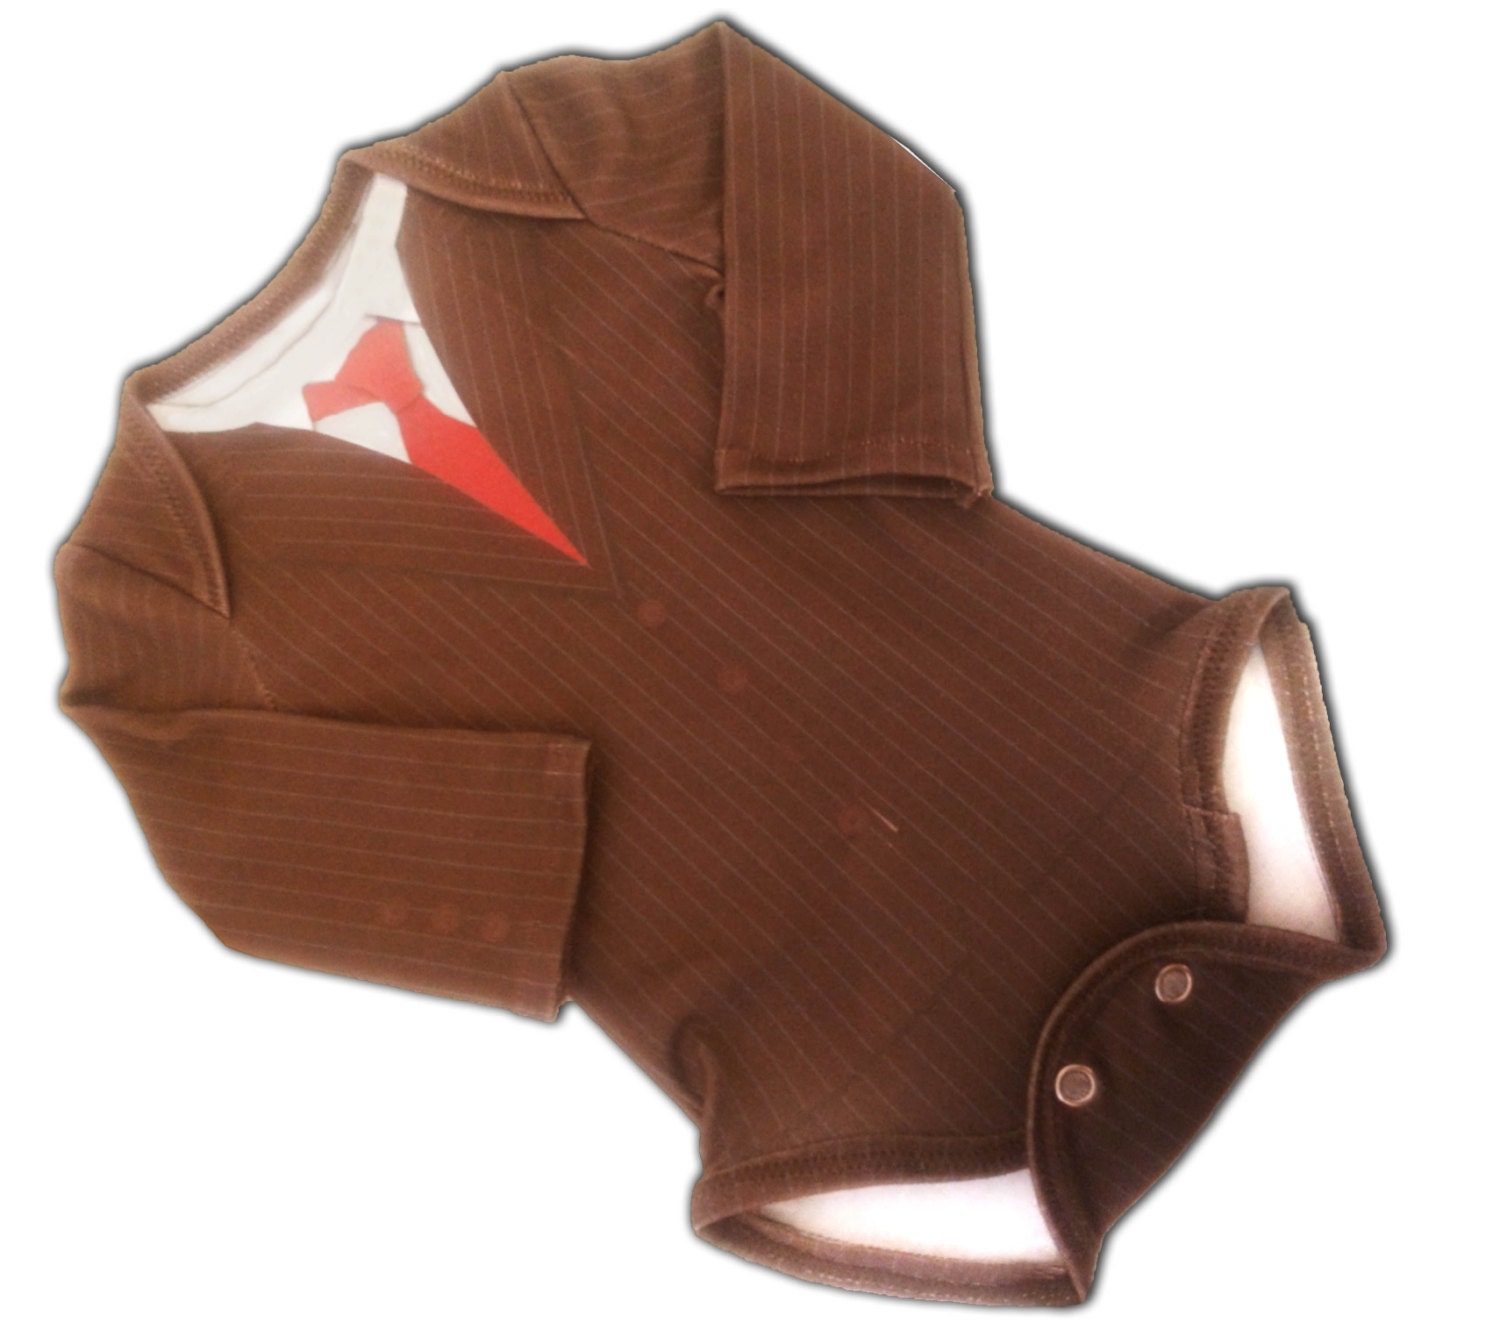
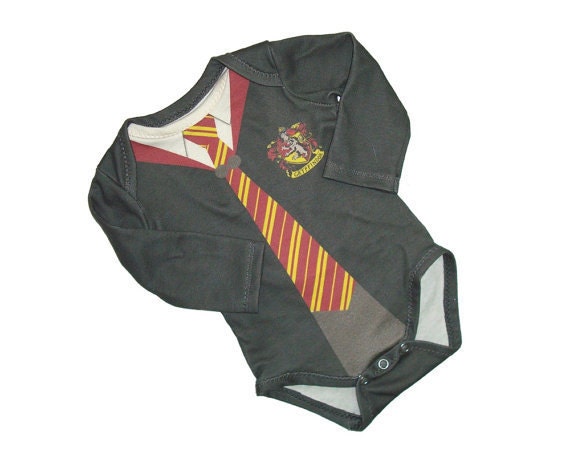
And here are some of the onesies she's making with my fabric:

Little yellow trekkieLittle yellow trekkie
by cichemom


Little 10th time lord- 3-6 months sizeLittle 10th time lord- 3-6 months size
by cichemom


Little Wizard 3-6 months onesieLittle Wizard 3-6 months onesie
by cichemom


Saturday, August 17, 2013

Sushi zipper pencil case

Half the reason I posted up my box-shaped zipper pencil case tutorial was so I could get the world to make this... my sushi pencil case!

This fun project is now available from my spoonflower shop: sushi pencil case cut & sew:


I guess it could hold chopsticks too?

Anyway a fat quarter of cotton makes the case, plus an optional crayon roll that coordinates quite nicely.

Here are some pictures of the finished product:


Saturday, March 23, 2013

Baby onesie pattern and tutorial

Here I am, 33 weeks pregnant and finally the sewing bug has gotten to me! Actually what happened was I went through my daughter's baby clothes and egads, why did I keep some of that stuff. I know we handed down a few less-loved items but there were still some nasty stained up onesies at the bottom of that bin.

So I sacrificed them. A variety of brands lended themselves to measurements and I arrived at my own personal onesie pattern, which I have decided to share with you all. Why, you ask, would a new mom opt to sew her own baby bodysuits when they come in six packs at Target? The same reason we sew anything, brain.

FABRIC.

Or maybe you want to use up an old t-shirt. Or maybe you just want to dive into a project for fun... after all, a bodysuit is a freaking front, back, and two sleeves. Does not take long. And it's baby clothes so if you screw up who cares, it's not like the kid's heading to a job interview.

One of my favorite spoonflower designers, robyriker, has a whole pink girly robot collection that my daughter just has to spend her first days in. I ordered a yard of the organic cotton knit thinking I'd make a quicky receiving blanket, but spoonflower's knits are 56" wide... I could make a whole onesie and still have a 36x40" square left for the blanket. For that matter, I could have just ordered a fat quarter of the stuff! But who can stop at a quarter?


So the pattern is simple, and like my other tutorials I'm not going to post a million steps.

Here's the PDF download: Free printable onesie pattern by spacefem

It's three pages. The front and back are split into pages but there's a dotted line across each half... make sure those dotted lines are seven inches apart. The front will overlap a bit, but the back pieces have a gap because the whole back is about 17-18" high.

This pattern is meant for a sort of 0-3 months size, but can obviously be scaled, lengthened, widened, etc. I just picked that size because let's face it, after the newborn gifty stage nobody has time to sew.

First, I cut 1.5" strips, 36" long each, for the trim. One strip will go for the neckline, the other for the bottom.

Then I cut out the other pieces.

Folded the trim strips in half, then one side in half again. Pinned it to the neckline of the front and just zig-zag stitched it because that's how a hack like me works with knits. But honesty, I think zigzag stitching gives it a homey cute handmade look, so I'm sticking with it.


I did the same to the back piece.

Next I hemmed each sleeve up 3/4" - just folded it in once and sewed.

Now time for the shoulder. You lay the front piece down, facing you. The back piece down on top of it, shoulders matching up. Then the sleeve goes in. If you opted to make the sleeve wider for the cute girly shirred looking option, you'll want to sew a loose thread into it first to ease it in. Match the armpit sections of the sleeve first, then pin the middle... which I admit is not what this picture shows but keep in mind the exact center of the sleeve will NOT match the exact center of where the front and back meet, because we humans need more sleeve behind us, if that makes sense.


Once both sleeves are in, match the side seams of the front and back up, right sides facing each other of course, and sew the whole length of the side, armpit and tiny sleeve length.

Then hammer some snaps in the bottom, that's always fun.

And you're done!

Well, I'm not DONE done because I haven't HAD THE BABY YET but my time will come. Tune in around May 8th to see how that goes, so far everything's been just lovely even if I don't walk quite as fast, I can still sew! And then I'll really be able to do a fit check and maybe update this with a photo of an actual child modeling my craft. Wish me luck :)


Update: I had my baby and she's perfect!

The onesie pattern is pretty darn awesome too... but of course, like most baby items, I don't have a picture of it fitting perfectly. We put it on her when she was a six pound newborn and it was pretty big. Then we put it on her when she was a 12 pound two-month old and it's a little snug (dang, that was fast!) But I think the 12-pound picture is cuter, so here she is. Oh, and her name is Olive, she's our second daughter and her hobbies are eating, staring at things, and apparently modeling my sewing projects: