This week I added a new free damask pattern to my gallery at openclipart - it's a remix of a cool botanical stamp, public domain, pure black & white. That gives it lots of possibilities so I figured I'd post up this quick GIMP tutorial to show how to make a really cool background out of it!
You can use this for any boring pattern that you want to make distressed and earthy looking.
Here's what we're starting with:
First I'm going to recolor it. I kinda like purple and gray this week, so with purple as my main color I use the bucket fill tool. I set the mode to "lighten only" so it only gets the black parts, and hold down shift so it fills the whole layer purple:
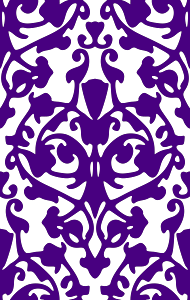
Next I change my color to light gray and go to Layer: New Layer and set the color to "foreground color".
Then Layer > Stack > to bottom moves it underneath the damask:
I go to Image > Flatten to get them on the same layer.
Now I want to tile it so I'll have a little variation in the distress pattern. I go to filters > map > tile, set the mode to "percent", click the "chain" to break it, and tile height 200% and width 300% - it gets a little more width since it's not as wide to start out with. Whatever you pick though make sure it's a multiple of 100% so the image will tile nicely.
Time to add some texture to it. I create a brand new layer.
On the new layer, I pick Filter > Render > Clouds > Plasma. Set turbulence to 7 and hit "new seed" a few times until you just like what you see, no big zones of darkness.
Go to filters > Map > Make seamless. Now I'm at this fine mess:
I set the layer mode to "darken only" so it brings out the damask pattern underneath
Colors > Desaturate so the layer is only gray tones
Colors > Brightness & contrast > Brightness minus 100 so it's darker
I adjust the transparency until I like what I see.
And now I have this, which is much darker in a cool vampire-y kinda way:
What do you think? A nice old wallpaper sort of background for any occasion. Playing with layer modes and brightness settings here can bring lots of interesting results, so have fun and let me know what works best for you!
Showing posts with label gimp. Show all posts
Thursday, August 15, 2013
Thursday, July 11, 2013
Tutorial: Making a chevron pattern with GIMP
Chevrons are totally in right now and it's easy to make a tile-able background, but I gotta warn you this takes a crazy math skill (multiplication) so I've used my brains to step in and tell you how to do it! And as you all know my favorite graphics program is GIMP, but these basic guidelines will work anywhere.
My favorite method is to just set your background color as something pretty, select a stripe across your image with the rectangle select tool, and hit delete. Any stripe pattern will work!
I went to my favorite website for color palettes to find this fun combo, titled Cafe 1950 by áfrica*.
Now use Filters > Map > Tile and tile your image by at least 300%.
Rotate the image 45 degrees, using the rotate tool or hit ctrl+r
Remember your original image height? I hope so!
Go to Image > Canvas Size.
Get out your calculator! Multiply your original image height by the square root of 2... about 1.41. My original image was 100 pixels high so now I'm cropping it to 141x141.
Under "offset", just hit the center button.
And for "layers", use the "resize all layers" option.
Now you have a diagonal pattern that will tile seamlessly - you can go to Filters > Map > Tile to test it out!
1) Layer > Duplicate layer
2) Filters > Map > Tile - now set the width only to tile to 200%
3) Layers > Stack > Layer to bottom
Now select your top layer in the list and flip it horizontally using the flip tool, or ctrl+h
Combine the layers using Image > Flatten Image.
And now you have one tiny part of your tile-able chevron pattern... use filters > map > tile to see how pretty it looks as a background!
Step 1: Make a striped background
Start a new image, whatever size you'd like, then give it some horizontal stripes. It works best if it's as wide or wider than it is tall.My favorite method is to just set your background color as something pretty, select a stripe across your image with the rectangle select tool, and hit delete. Any stripe pattern will work!
I went to my favorite website for color palettes to find this fun combo, titled Cafe 1950 by áfrica*.
Tile & rotate
First, pay attention to the height of your image in pixels because you'll need to know that later. My image was 100 pixels high.Now use Filters > Map > Tile and tile your image by at least 300%.
Rotate the image 45 degrees, using the rotate tool or hit ctrl+r
Crop
Now it's time to get your diagonal pattern to the right size, so it tiles seamlessly.Remember your original image height? I hope so!
Go to Image > Canvas Size.
Get out your calculator! Multiply your original image height by the square root of 2... about 1.41. My original image was 100 pixels high so now I'm cropping it to 141x141.
Under "offset", just hit the center button.
And for "layers", use the "resize all layers" option.
Now you have a diagonal pattern that will tile seamlessly - you can go to Filters > Map > Tile to test it out!
Turn diagonal stripes into chevrons
But we were going for chevrons weren't we!1) Layer > Duplicate layer
2) Filters > Map > Tile - now set the width only to tile to 200%
3) Layers > Stack > Layer to bottom
Now select your top layer in the list and flip it horizontally using the flip tool, or ctrl+h
Combine the layers using Image > Flatten Image.
And now you have one tiny part of your tile-able chevron pattern... use filters > map > tile to see how pretty it looks as a background!
Subscribe to:
Posts (Atom)


